28 February, 2012

Creating the Studio (Part 2)

A time limit has been set for me and my studio. One I don't mind to say the least, but I already have a couple orders in and I don't have anything ready. So pressure is on!

After all the troublesome work on the floors, I was definitely ready for a change of pace. Next up: cleaning. TSP: Trisodium phosphate is the best! Because I need a good surface for the epoxy to adhere to, I not only used the TSP on the walls, but on the floors. Even though I already sanded the floors I feel it best to allow the TSP to remove any leftover gloss. Can never hurt to prep twice.

But before I could paint, I have to do all my repair work. The tabs from the closet doors took some chunks out so out came the mud. Some simple spackle filled the nail and screw holes that were scattered about the walls. 

Then came the primer. I used it for this room and not the guest bedroom because the existing color is darker than the new one. If I do not primer first, then the darker colors will show through, requiring multiple coats to cover it up.

Because I mudded the same day I primed, I cannot paint over it. The mud needs 24 hours to dry before any paint can be applied. So those spots will have to wait until the following day. 


 After much debate, I finally decided to paint the walls first. It took a while to decide on a color. I had actually picked a color out on the oops paint rack, but it didn't come out the way I thought it would. So back to the swatch isle...

And this is the color that was selected! :)


 I have to admit, it was nice not having to worry about the base board. It made recoloring the room so much easier!


While the walls dried, I painted the floors.

I used Behr 1-part epoxy concrete and garage floor paint which can be purchased from Home Depot for $32. You can have it colored to any shade of your choice. It is super easy to use, doesn't require a sealer, and is very easy to maintain. Although the dry time was a bit of a drag (72 hours before furniture can be brought in).

Before I finished off the first layer of floor paint and closed the door to the room so everything can dry undisturbed I snapped a picture... What do you think?


Not too shabby, huh?

Cheers~

25 February, 2012

Creating the Studio (Part 1)

This could possibly be my favorite room in the house... Ok, not really as I love the entire house equally, but I do get to design this room the way I want with no approval from my Love. So its definitely a bonus on it's part.

My first set of jobs were pretty easy. Just a little muscle work from my Love (as I'm still recovering from surgery), a hammer & drill, and a box cutter to get the room prepped for its new makeover! 

Because we were not really focusing on this room at first, it has become a bit of a storage room. Sure some of the stuff in there belongs there, but the rest doesn't and was organized as we cleaned.

We then pulled the closet doors, frame, and shelf down. We also removed the "random shelf". We will be saving all the shelf pieces for later, but the closet doors are being put in the attic in the mean time 'til we can decide what we will do with them. 


Then the carpet... Oh that lovely carpet. BE GONE!! 


Haha I couldn't resist! Wish that really happened.

My studio just went absolutely random! The painted concrete was definitely something that I did not expect! I do enjoy goofy little surprises, but I have to admit, after talking with the guy at Home Depot, I'm liking this surprise less and less.

The upside : we had to get a belt sander *YAY more tools!!!*

Because the floors were already painted, it took quite a bit of extra work to prep for a good layer of epoxy coating. First I had to make sure that all the concrete chips were pulled up (these came from the tacks when I was pulling up the carpet tack board) as well any peeling paint.
But during this little venture, I found that the baseboard had been epoxied not only to the floor, but painted with it as well. This again messed with the plans as it is too much work to clean up the globbed mess. So off went the baseboard.

Then it was time to whip out the belt sander. And sand the entire floor. Yeah, a bit daunting. Lucky for you, you don't have to do it! Haha.

I like to work in steps, keeping everything dirty, clean, and new all at the same time. So I did all the dirty work first.

Overall just the prepping of the floor took roughly 16.5 hours. Yeah... I'm soooo glad its done!


Cheers~


21 February, 2012

Goals & Plans

Friday February 3rd I was admitted to the hospital for severe abdominal pains. Turns out my gallbladder was only working 11% so they had to remove it. Because I had surgery (and the bills...) our projects have been somewhat stalled.

Originally we were going to tackle the bathrooms, but I will not be able to help with most of it so we are having to refocus.

Like I mentioned in my post, Ideas for Big Changes, my Love and I are wanting to open the hallway, kitchen/dinning room window, and kitchen doorway a little more. These are much easier to do, so these have been bumped up the list to the top. This will also allow us to finally paint the rooms. YAY!!

We will also be purchasing the wood to build our work benches (2 long ones for the garage and one for my studio). These will be very helpful when it comes time to tackle the bigger projects.

Then we will also complete the cabinets for the laundry room.

For this year our goals are:

1) Garage ~ shelves installed, benches made, and possibly electrical addition finished
2) Laundry ~ cabinet and shelf installed
3) Openings (Hallway, Kitchen Doorway, Window) finished
4) Paint the great room
5) Complete media corner
6) Guest Bedroom ~ carpet and vanity installed
7) Studio ~ painted, carpet removed,concrete cleaned, work bench made
8) Master ~ bathroom finished, room painted, closet possibly finished
9) Exterior ~ weed killer, citrus trees irrigated

Aw man. Now that I look at the list, we sure have our work cut out for us! Now where did my hammer go?

Cheers ~


14 February, 2012

Making a Garage into a Shop (Part 2)

It is funny, no matter how determined you are to finish a project, items pop up that delay it's completion. 

We are finally finished with the basic upgrades in the garage.

After the ending of Part 1 we turned our attention towards the ceilings. With all the lose mud scraped off and the peeling tape removed, there were a couple somewhat quick steps to finishing off: the placing of new mesh along the seams, a bit of mud to cover the mesh and smooth things over, and lastly laying a heavy coat of primer for sealer.

After that was dry, everything was moved from the garage so the floors could be cleaned.

After sweeping everything the floors were hosed of remaining dust. We used muriatic acid twice, which is normally used in swimming pools, on the concrete to pull up any oil and grease.

Since it was a few days until we were able to actually work on the house again, we re-cleaned the floors the day before we laid the epoxy coating, using the cleaner that came with the kit.

Speaking of the kit, we used RustOleum's Epoxy Shield for garage floors, which can be purchased at Home Depot. It comes with an instructional DVD and plenty of "sprinkles." The only items that you need to supply are the actual tools for the job. Be sure to get the adhesive 9" roller brush. The material used is different and will be easier to roll the epoxy. If you use a standard paint roller, you will have trouble getting an even coat. Not to mention all the small threads that are released from the matting.


Once the floors were cleaned, (the above pictures are before the final wash) we started the epoxy. A really simple task that one person could do. I helped my Love because it was too fun of a job to throw "sprinkles" all over the place.


After 14 hours, items were brought back into the garage.


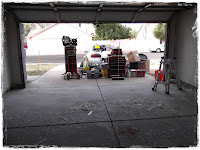
To refresh your memory, the garage originally looked like this:

My Love is so happy. And I am as well. Now we can get some shelves in here so we can organize some more! :)

Cheers~


09 February, 2012

Ideas for Big Changes

I was just writing my Nana when I was struck with an idea for a post! I found this really cool website where you can design your own house! Floor Planner is extremely detailed and quite thorough. It's free to sign up and you are allowed one project. You can change and adjust as many times as you like. Which I used to my advantage. >:]

Below is a layout of our house right now. It isn't perfectly to scale, but I did try my best. 


This is what the floor plan will look like after we complete our changes...


First we will begin our renovations in the bathrooms. 
The master is the very first project we will be tackling. It is also one of the biggest goals we have for this new year. We are looking to open the doorway leading into the bathroom from the bedroom (the current door size is 24"). Then we will be pulling out the current vanity, closet shelves & racks, toilet, and the bathtub & tiles. We are not going to gut the bathroom, just remove the old and start from fresh.


We are not planning on changing anything in the layout, which keeps things somewhat easy. So from there, we will replace the tub with a full walk in shower (two shower heads for comfort... Hehehe Oh I cannot wait!) tiled with travertine. The wall between the closet and the bath will be opened up and turned into an archway. The 24" doorway will be opened to a 36". It will also be changed from a hinged door to a barn sliding door. The toilet (which is the "14 gallon flush") will be replaced with a low flow eco toilet. The vanity will be made out of a beautiful hardwood, deep stained with some drawers. We will be adding some built in shelves above the toilet to help with storage. We will use every space in the closet that we can. Turning it into a fully organized space with drawers, shoe cubbies, coat cabinet, and the clothes bars.

Next will be the guest bath. This space is going to be much easier than the master. We will remove all the original items just like the master, but this time, we will be closing the cabinets in the hallway and opening them to the bathroom. We will turn the cabinets to some shelves and a bench seat with storage. The old shallow cast iron tub will be replaced with a new soaking fiberglass tub. The white porcelain tiles will be replaced with the same travertine in the master. The same eco toilet will be installed here and the same counter tops. Should be a fun project!! 

Because the house is old, all the windows and doors need to be replaced. They leak like an fan on high. So in the mist of these replacements, we will turn the large three pane windows in the living room to either french doors or sliding doors. We will close off the existing door and leave space for an upholstered chair. Hehehe.

To open things up we will also be opening some doorways and walls. The first will be the hallway. We will remove about four or five feet to open the hallway to make the living room feel more open.

Now for the kitchen. *rubs hands together* Muhahahahaha

The window between the kitchen and great room will be opened more, taking it up another 2 ft. to the ceiling in the kitchen. The doorway will also be opened to the ceiling and widened another foot - foot-and-a-half.

Exciting, no?


Cheers~