It is funny, no matter how determined you are to finish a project, items pop up that delay it's completion.
We are finally finished with the basic upgrades in the garage.
After the ending of Part 1 we turned our attention towards the ceilings. With all the lose mud scraped off and the peeling tape removed, there were a couple somewhat quick steps to finishing off: the placing of new mesh along the seams, a bit of mud to cover the mesh and smooth things over, and lastly laying a heavy coat of primer for sealer.
After that was dry, everything was moved from the garage so the floors could be cleaned.
After sweeping everything the floors were hosed of remaining dust. We used muriatic acid twice, which is normally used in swimming pools, on the concrete to pull up any oil and grease.
Since it was a few days until we were able to actually work on the house again, we re-cleaned the floors the day before we laid the epoxy coating, using the cleaner that came with the kit.
 Speaking of the kit, we used RustOleum's Epoxy Shield for garage floors, which can be purchased at Home Depot. It comes with an instructional DVD and plenty of "sprinkles." The only items that you need to supply are the actual tools for the job. Be sure to get the adhesive 9" roller brush. The material used is different and will be easier to roll the epoxy. If you use a standard paint roller, you will have trouble getting an even coat. Not to mention all the small threads that are released from the matting.
Once the floors were cleaned, (the above pictures are before the final wash) we started the epoxy. A really simple task that one person could do. I helped my Love because it was too fun of a job to throw "sprinkles" all over the place.
 After 14 hours, items were brought back into the garage.
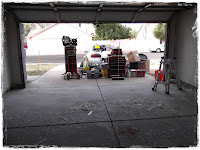
To refresh your memory, the garage originally looked like this:
My Love is so happy. And I am as well. Now we can get some shelves in here so we can organize some more! :)
Cheers~
After that was dry, everything was moved from the garage so the floors could be cleaned.
After sweeping everything the floors were hosed of remaining dust. We used muriatic acid twice, which is normally used in swimming pools, on the concrete to pull up any oil and grease.
Since it was a few days until we were able to actually work on the house again, we re-cleaned the floors the day before we laid the epoxy coating, using the cleaner that came with the kit.
 Speaking of the kit, we used RustOleum's Epoxy Shield for garage floors, which can be purchased at Home Depot. It comes with an instructional DVD and plenty of "sprinkles." The only items that you need to supply are the actual tools for the job. Be sure to get the adhesive 9" roller brush. The material used is different and will be easier to roll the epoxy. If you use a standard paint roller, you will have trouble getting an even coat. Not to mention all the small threads that are released from the matting.
Once the floors were cleaned, (the above pictures are before the final wash) we started the epoxy. A really simple task that one person could do. I helped my Love because it was too fun of a job to throw "sprinkles" all over the place.
 After 14 hours, items were brought back into the garage.
To refresh your memory, the garage originally looked like this:
My Love is so happy. And I am as well. Now we can get some shelves in here so we can organize some more! :)
Cheers~


No comments:
Post a Comment